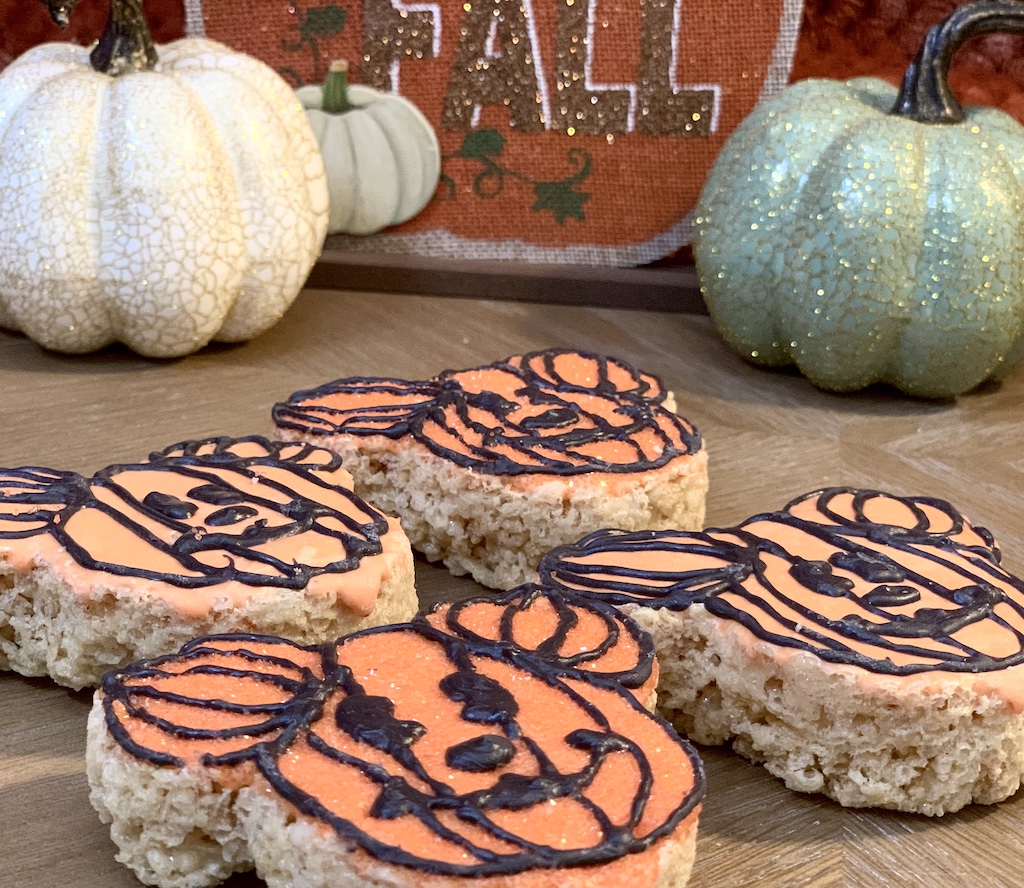
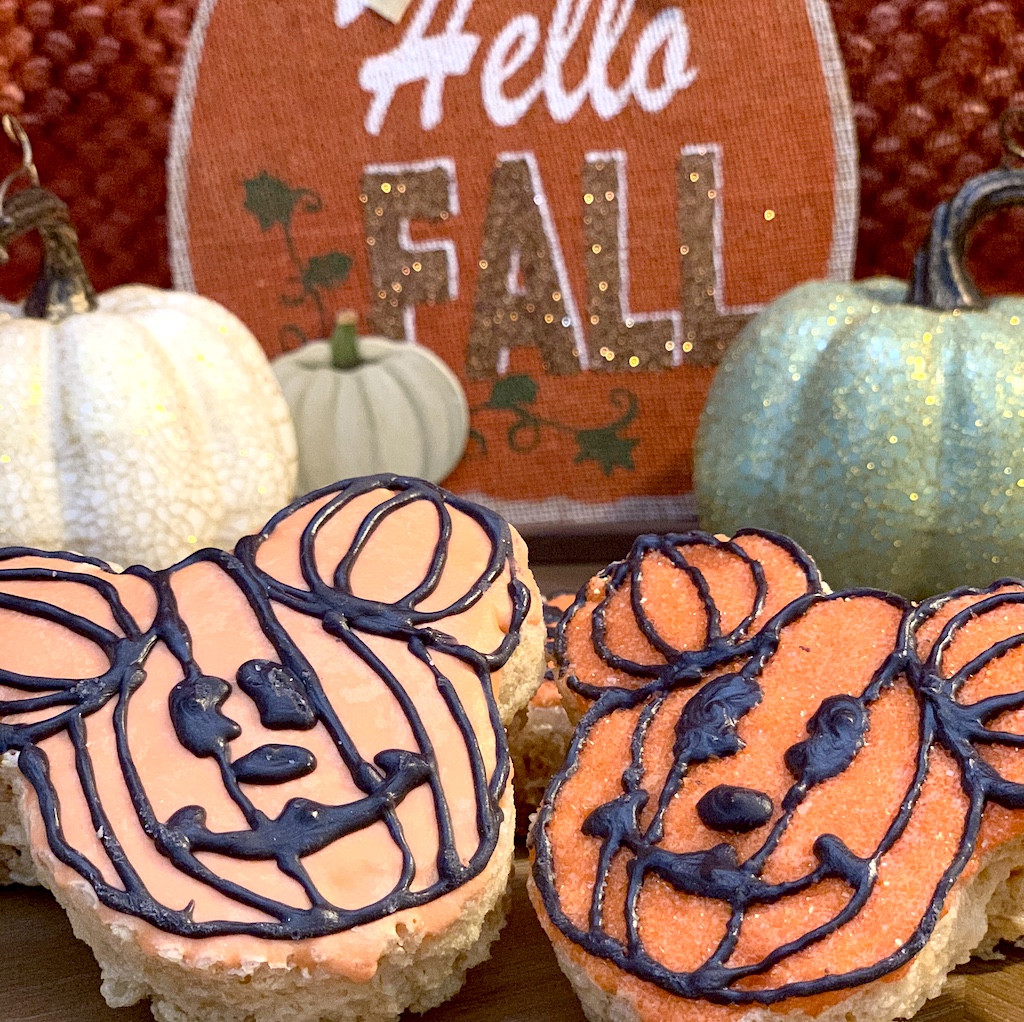
Want a delicious Halloween Disney treat, but can’t make it to Disneyland any time soon? Try our Disneyland Inspire Mickey Halloween Rice Krispie Treats!
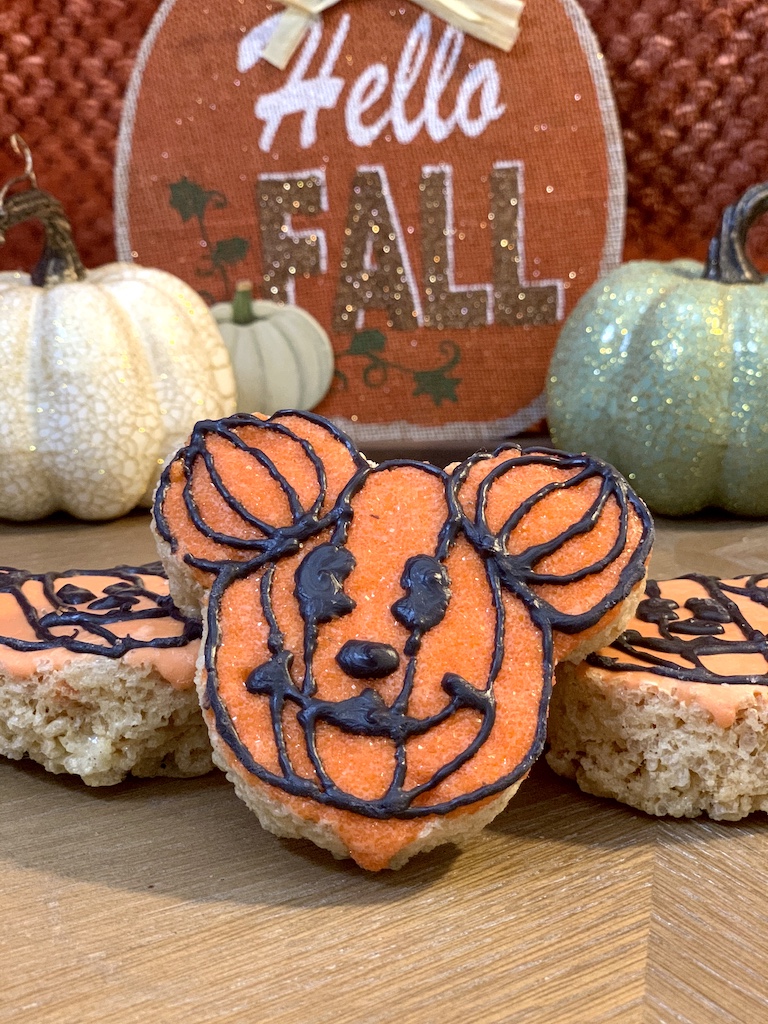
These delicious Halloween Mickey Treats are just like the ones in the park. Make them at home for your next Halloween get together!
Having a fun Halloween party? Pair these with this vampire’s kiss cocktail and serve these Halloween brownies too!
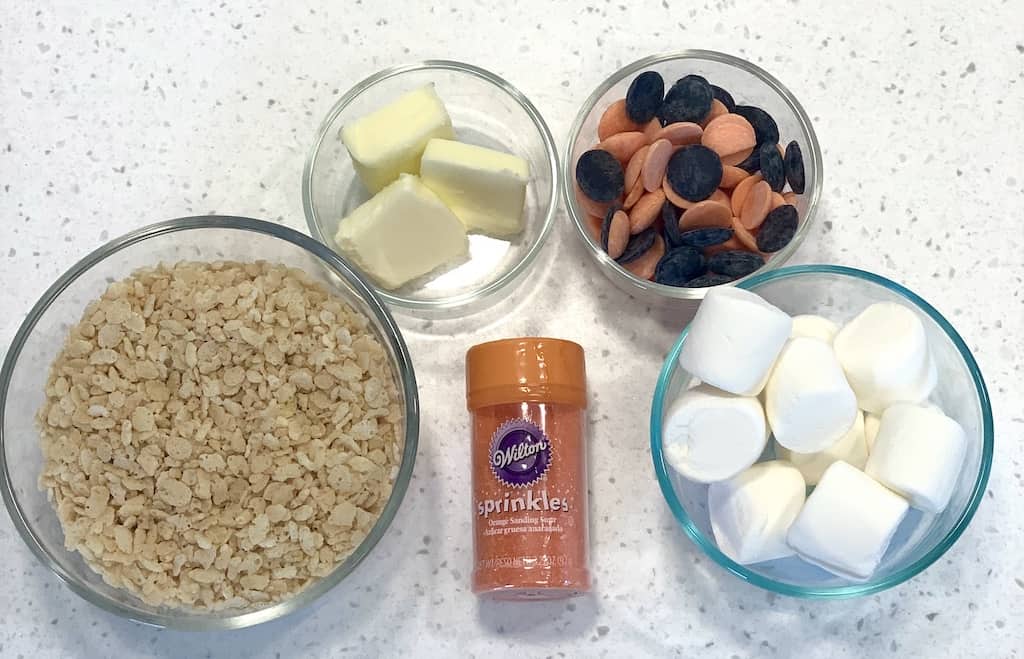
Ingredients:
6 cups Rice Krispies Cereal
10 oz (about 40) Marshmallows
3 Tbsp butter
Orange candy melt
Black candy melt
Orange sprinkles (optional)
Directions:
Follow the directions to make your rice krispie treats on the Rice Krispie Box. If you don’t have directions, follow step 1-7 below.
Rice Krispie Directions
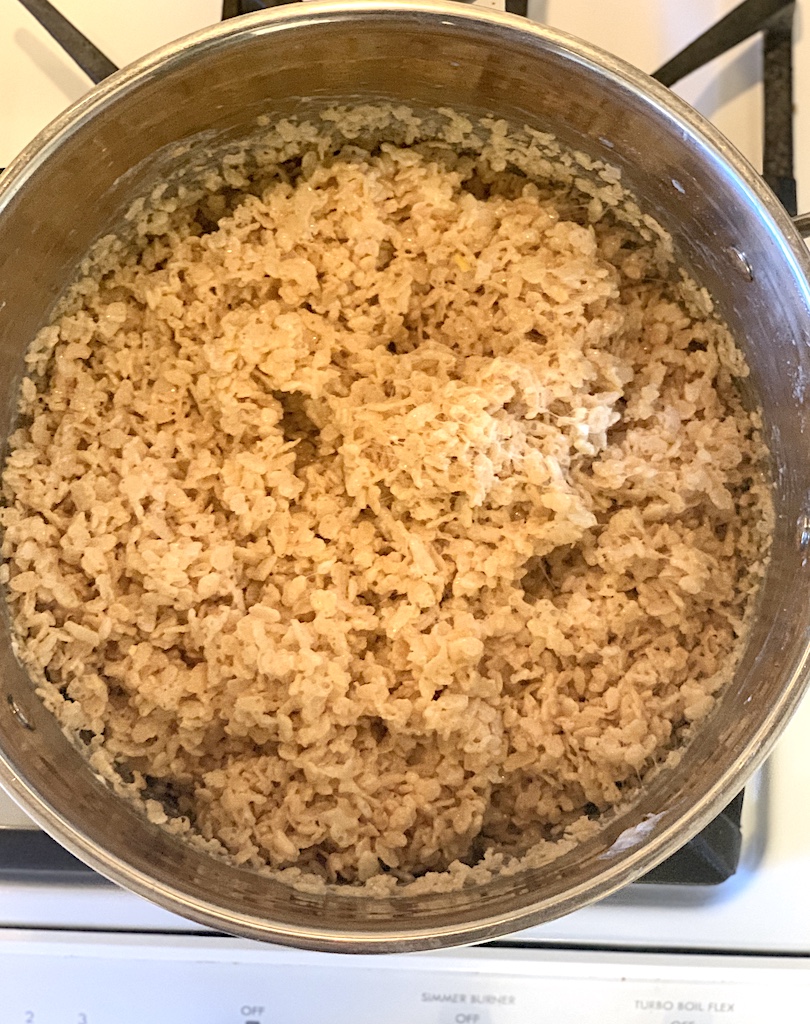
- Melt the butter in a pot on low to medium in a large saucepan.
- Once butter is melted, add in about 40 marshmallows and melt on medium heat. Be careful to not burn it.
- Once marshmallows are fully melted, remove from heat, and add in 6 cups of the Rice Krispies cereal
- Mix in the cereal to the melted marshmallows and stir to fully coat all of the cereal.
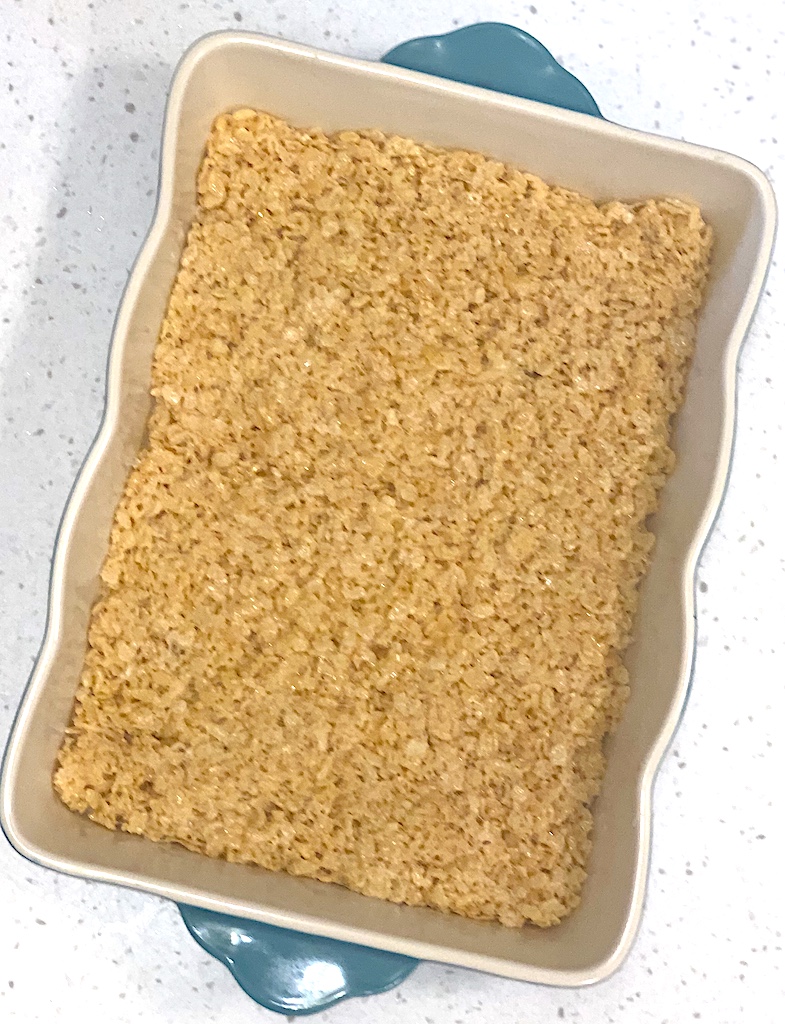
- Once fully mixed, put the cereal into a greased pan and allow the cereal to harden.
- Once hardened, flip the cereal upside down on a cutting board or the counter laid out flat.

Mickey Rice Krispie Directions
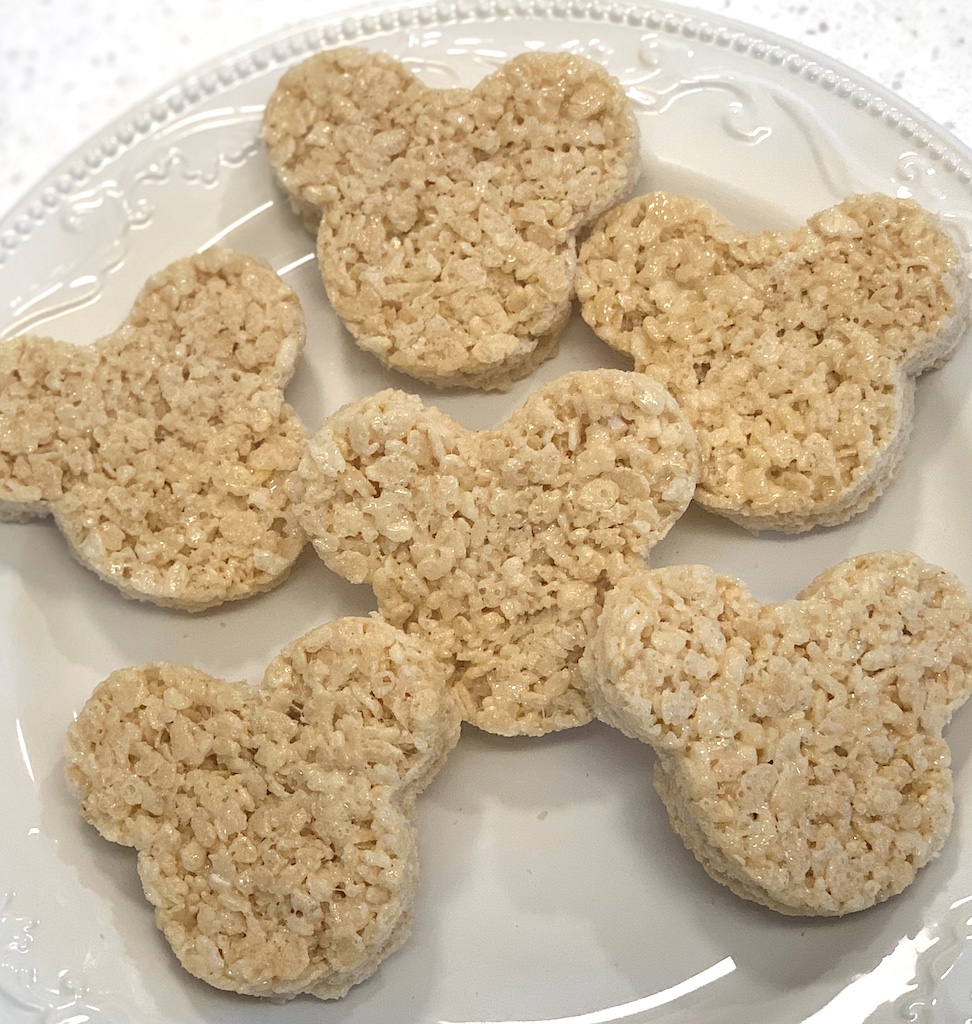
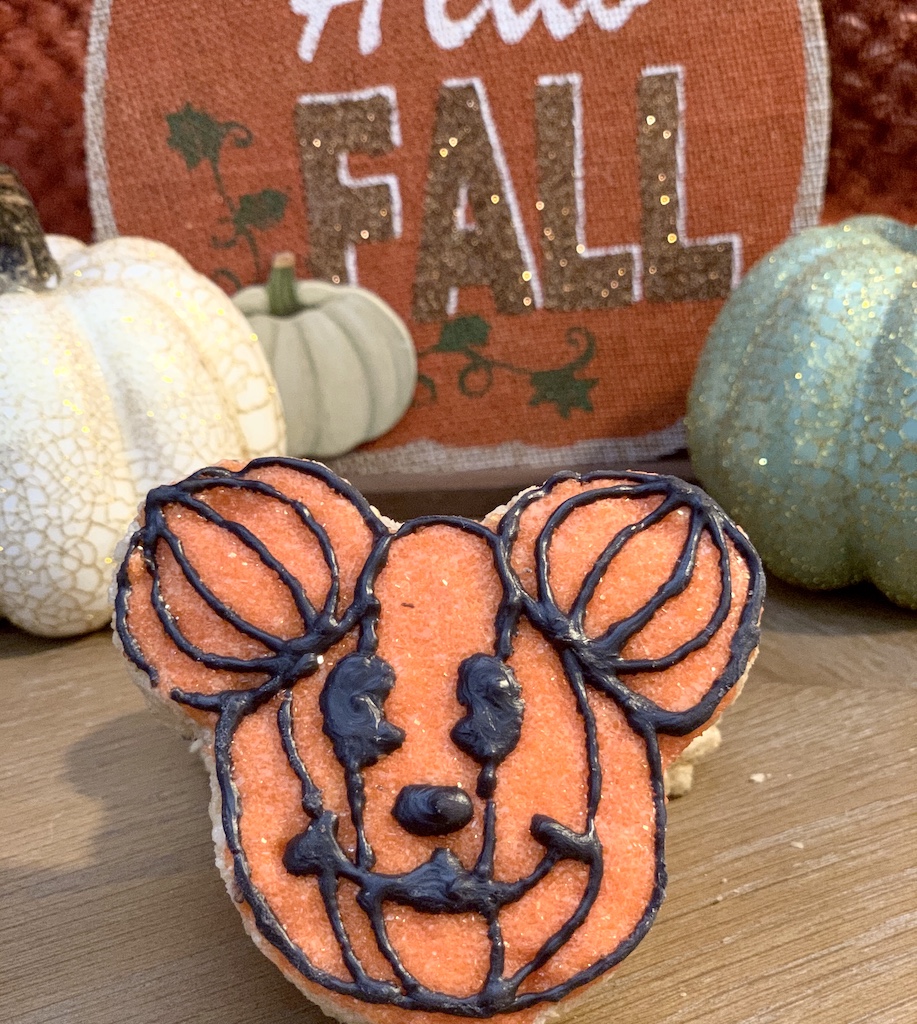
1. Use a Mickey shaped cookie cutter to cut the shapes of the Mickey head. If you don’t have a cookie cutter and want to try to cut on your own, try with a knife.
2. In a microwave, slowly melt the orange candy melt and fully coat one side of the Mickey Mouse head as close to the edge as you can.

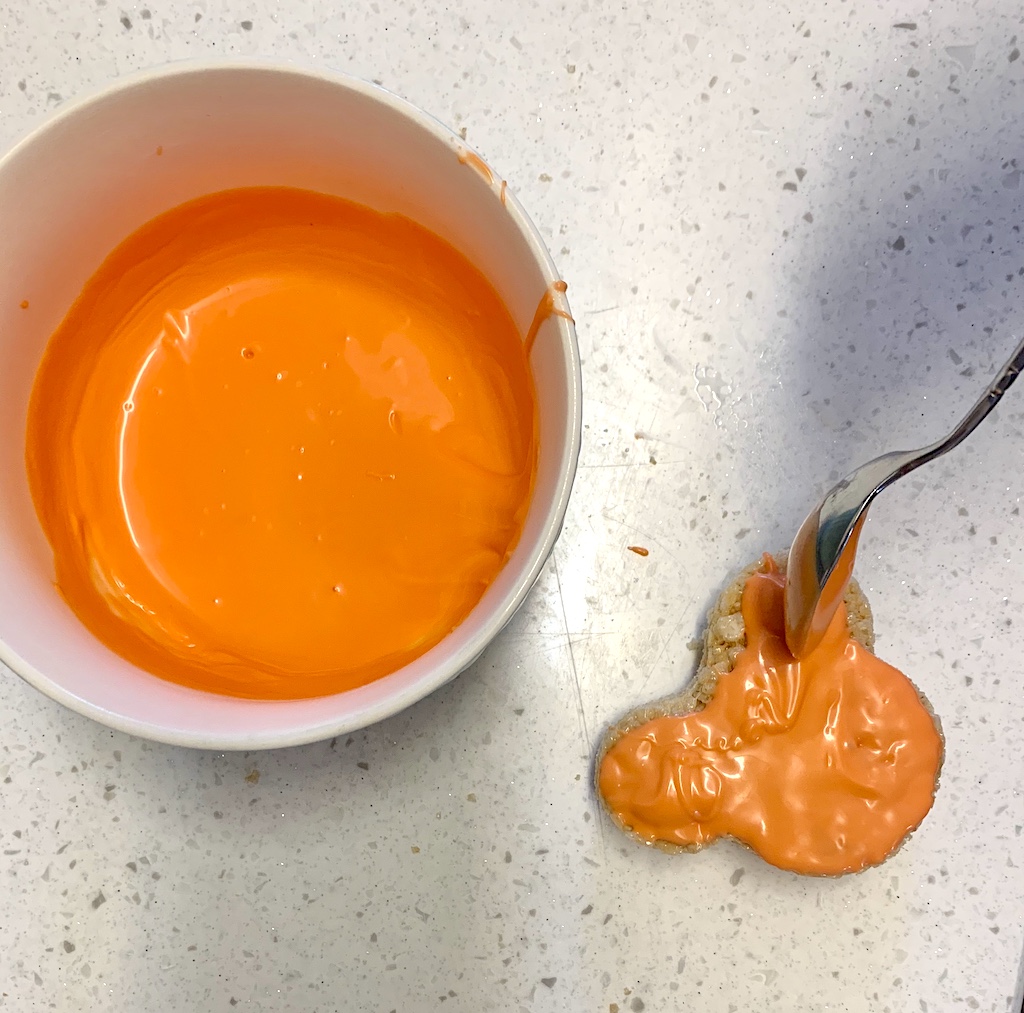
3. If you’d like to add orange sprinkles and fully coat the treats after the candy melt, do this step while the orange candy melt is still wet so the sprinkles can stick fully to the treat.
4. Melt the black candy melt and add to a baggie or piping bag with a small hole (doing it in a bag makes it a lot easier to decorate the treats).
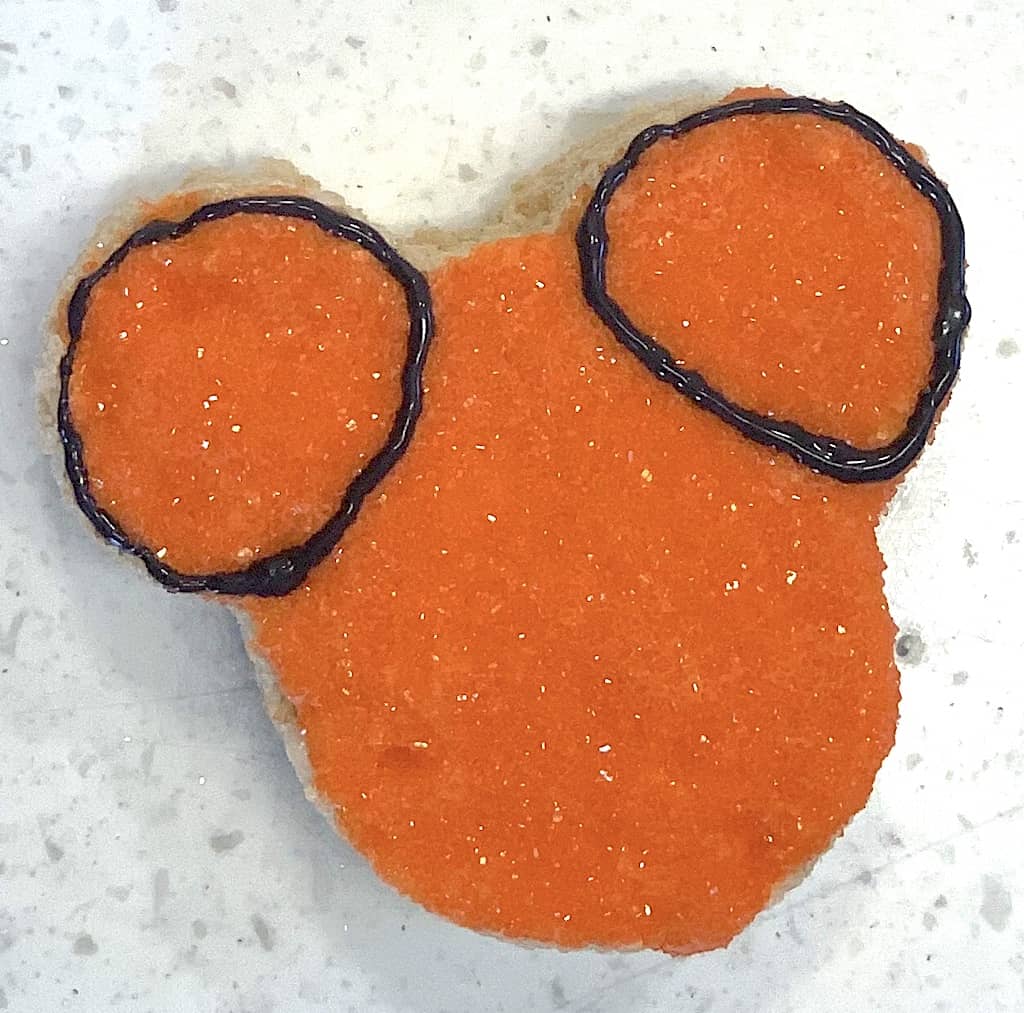
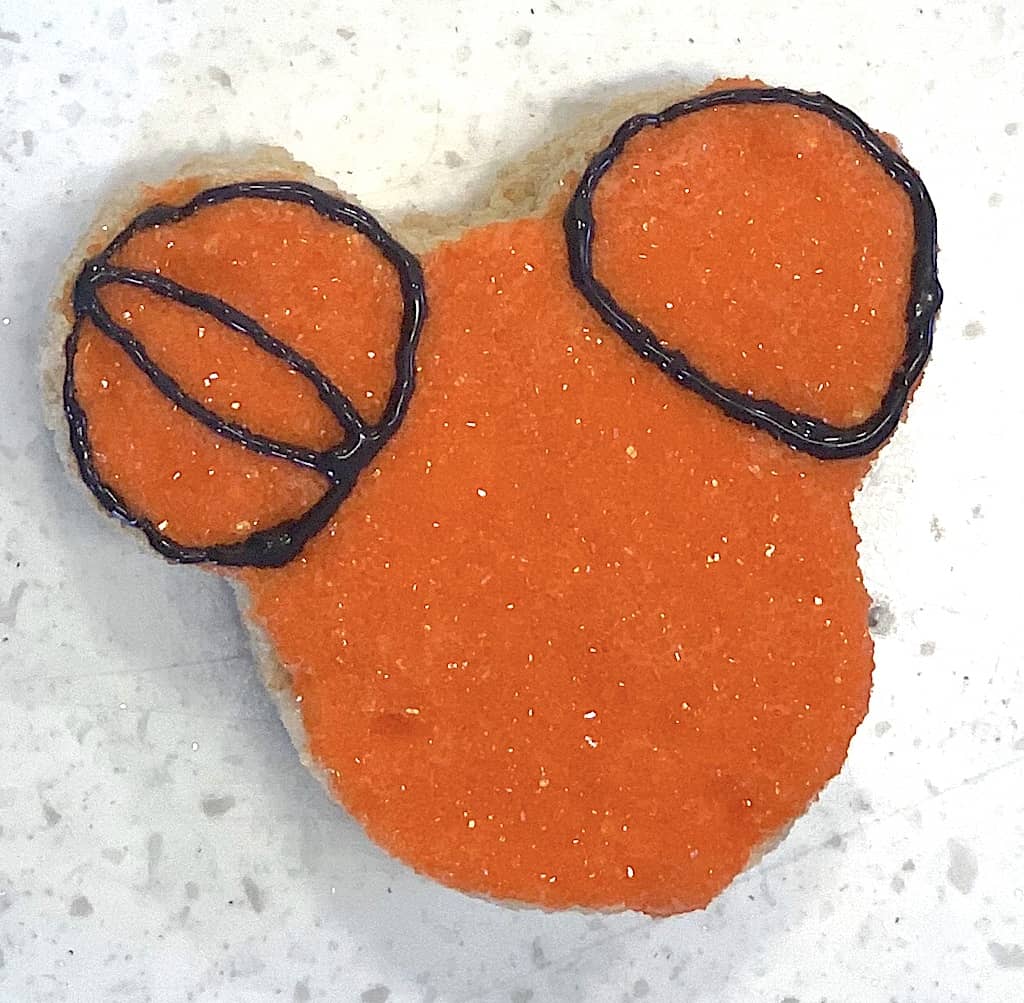
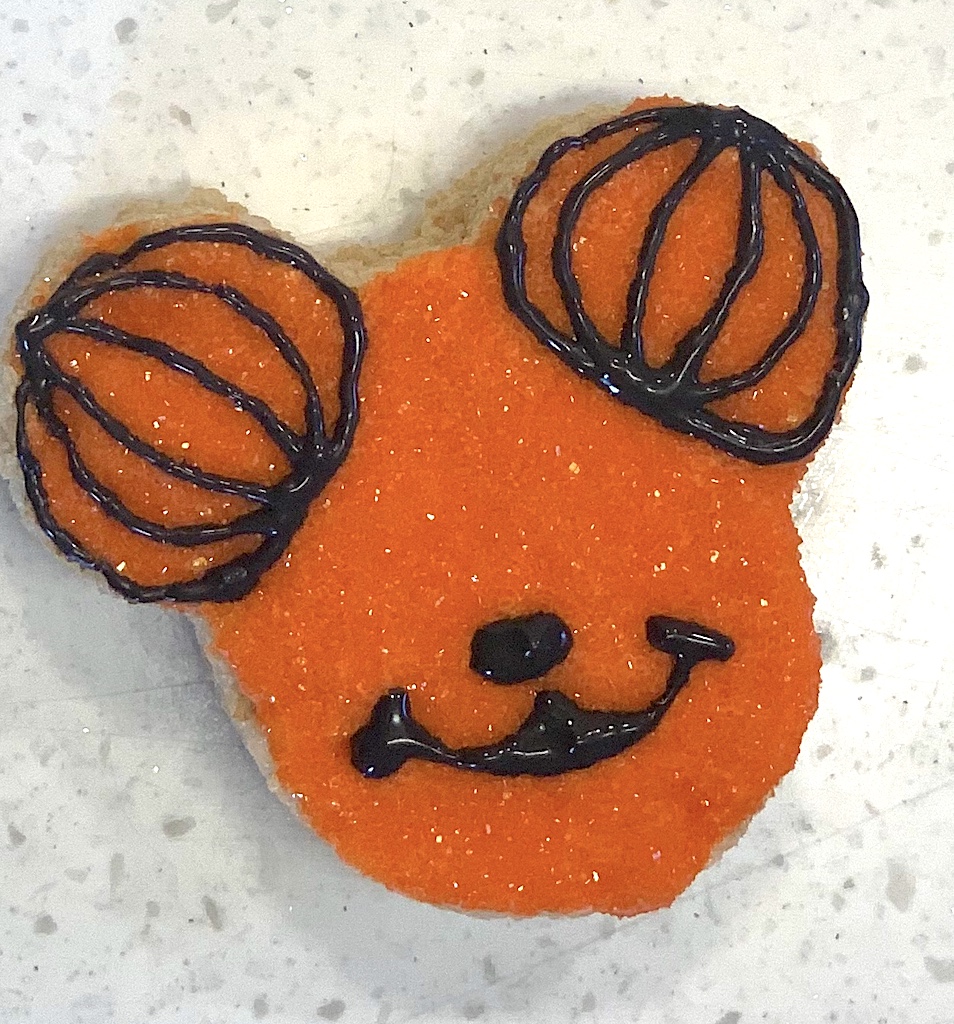
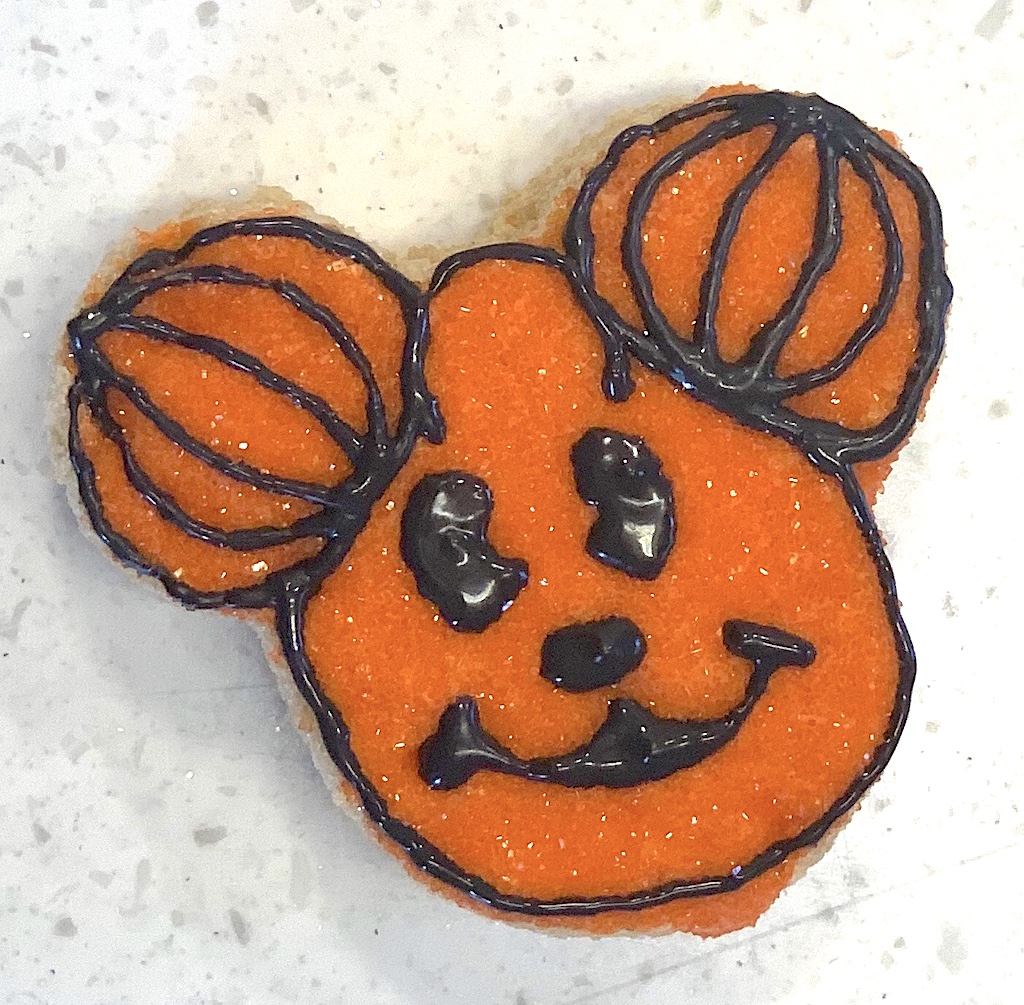
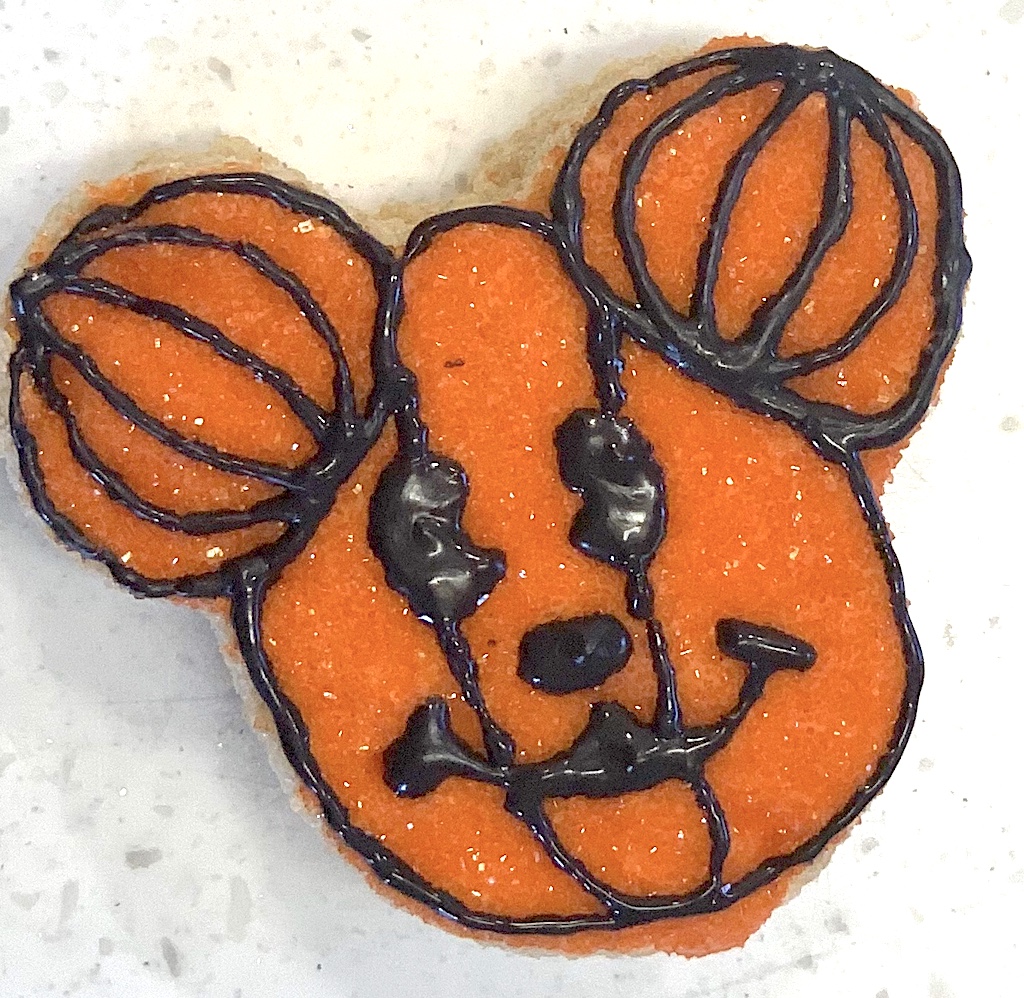
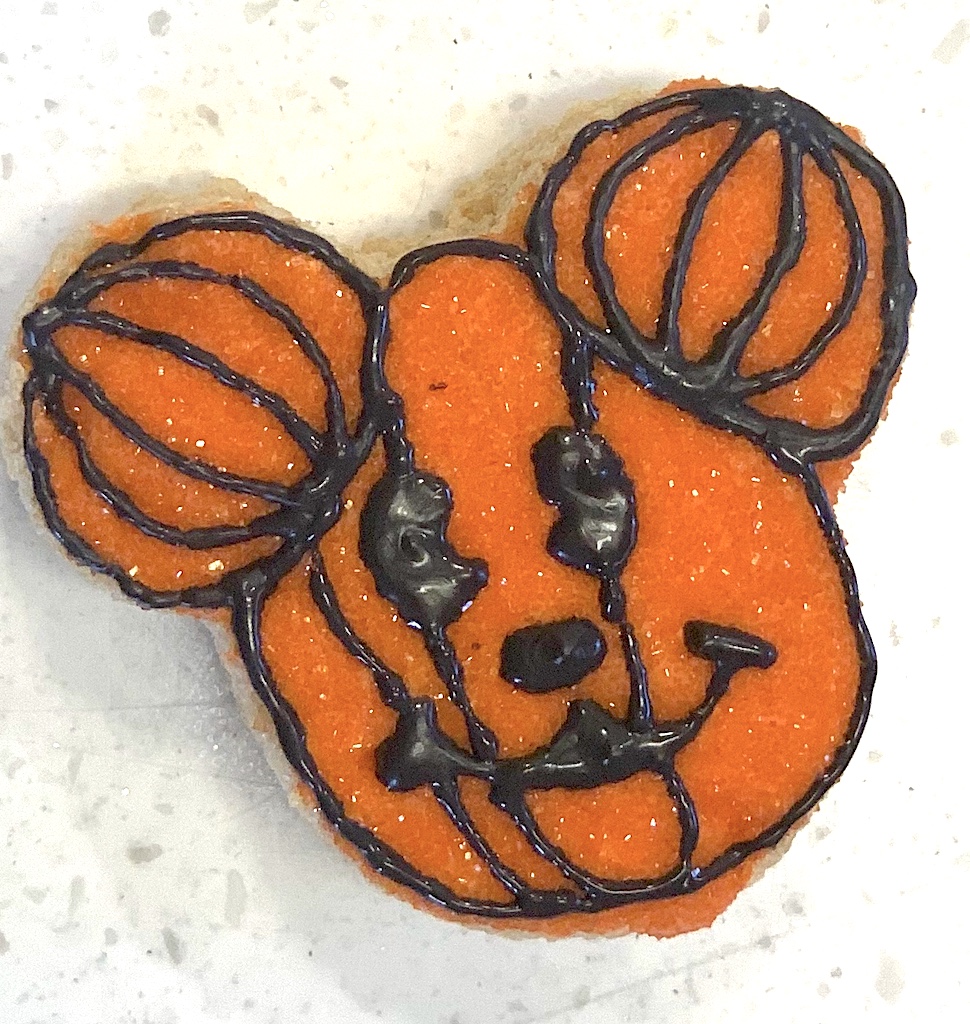
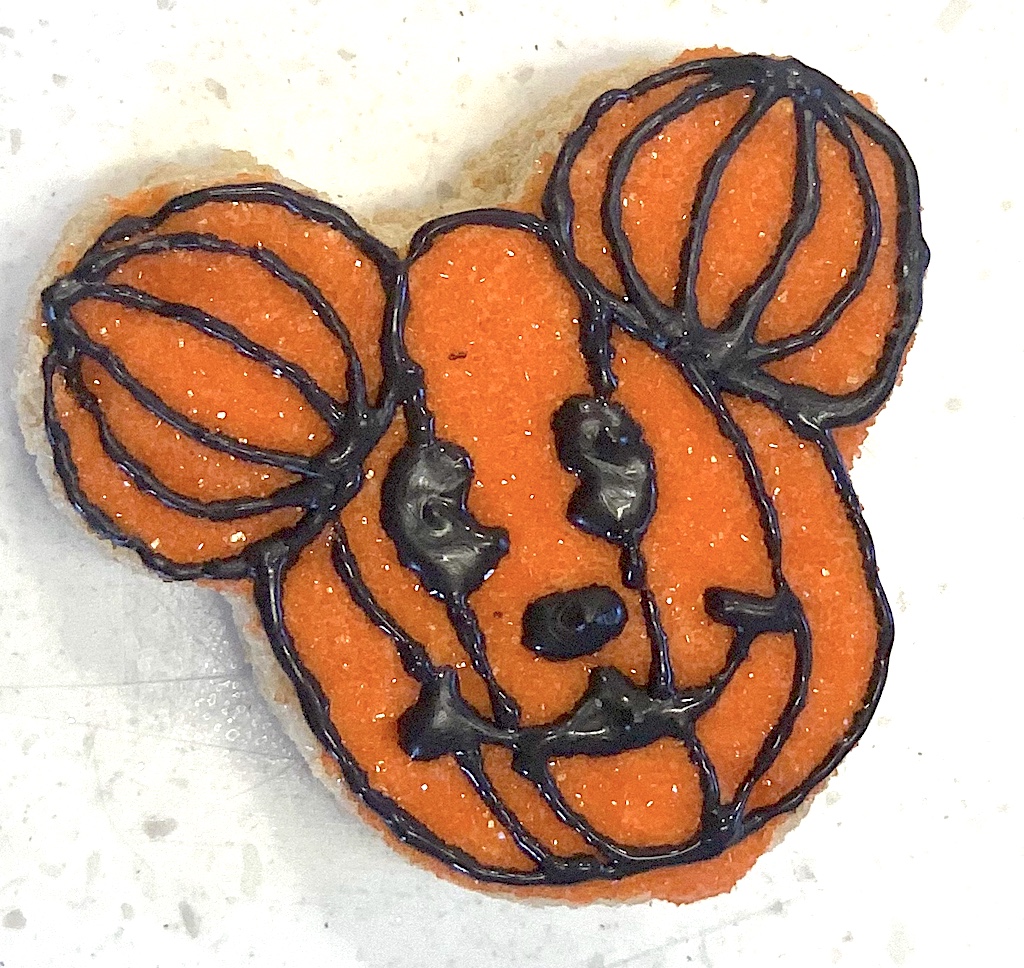
5. Outline 2 circles where the ears are. Then add a long oval shaped circle in the middle of the circles.
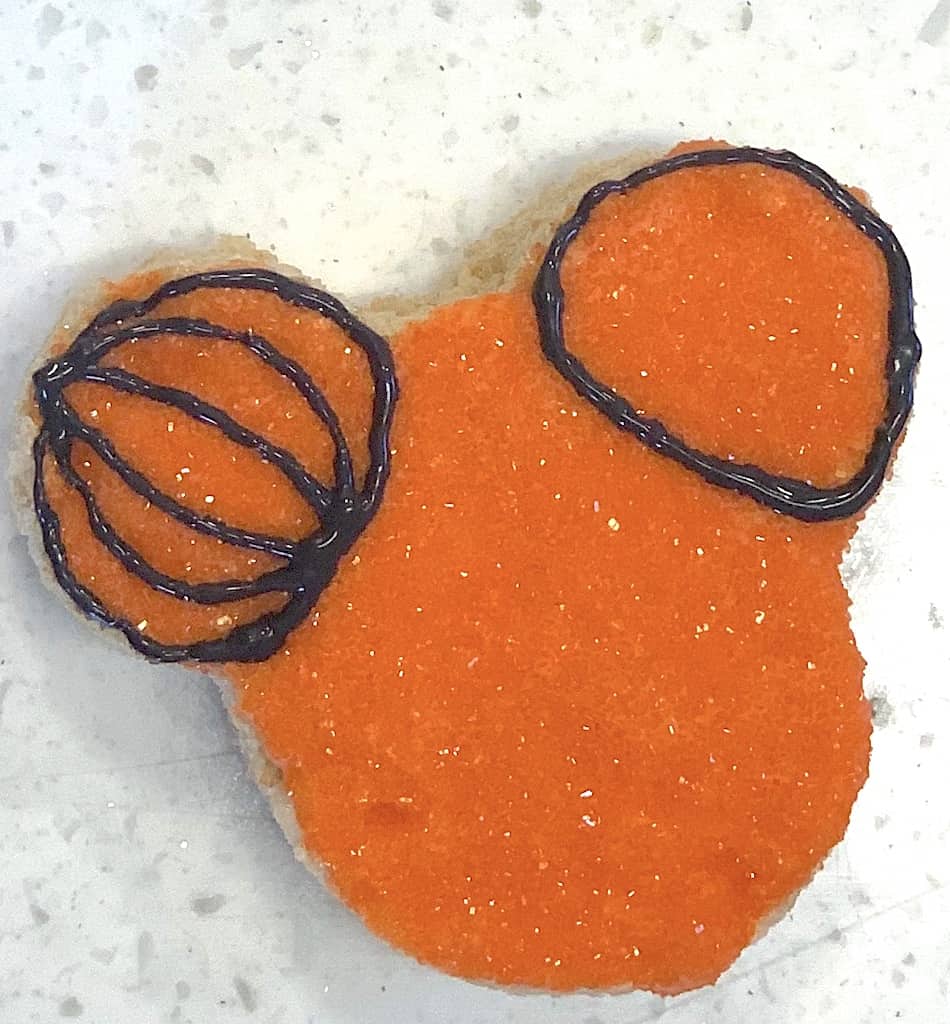
6. Next, add two more lines on both sides of the oval following the same direction (on the left they curve left and on the right they curve right).
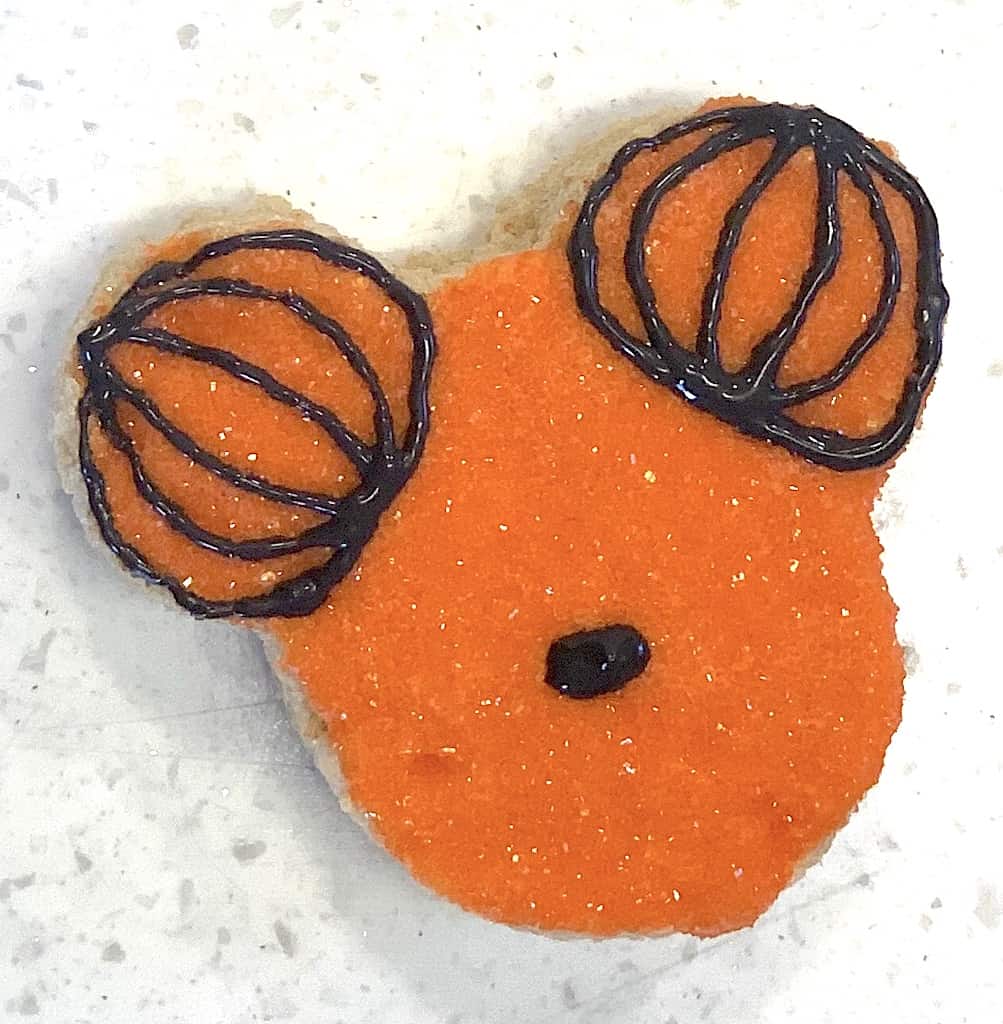
7. In the center of the treat, draw an oval nose as close to the middle as you can.
8. Draw a smile. Add the dimple lines as the end and in the middle you want to raise the smile a little bit.
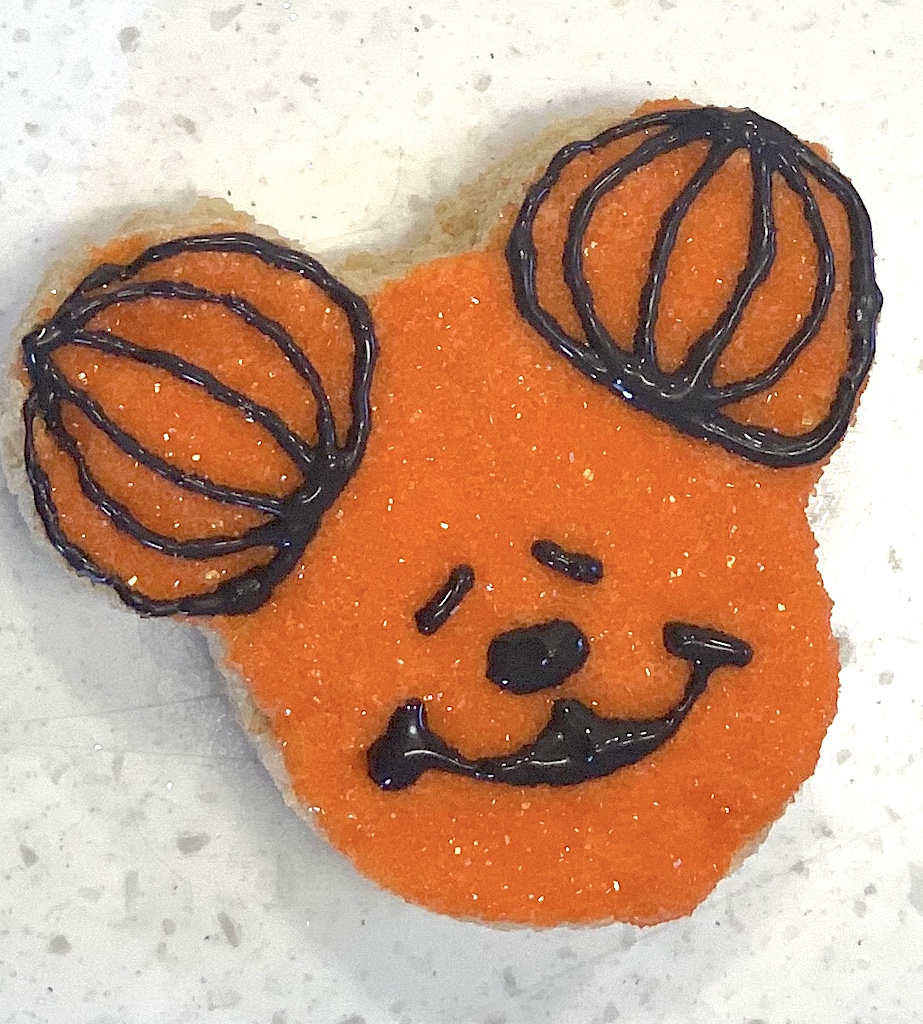
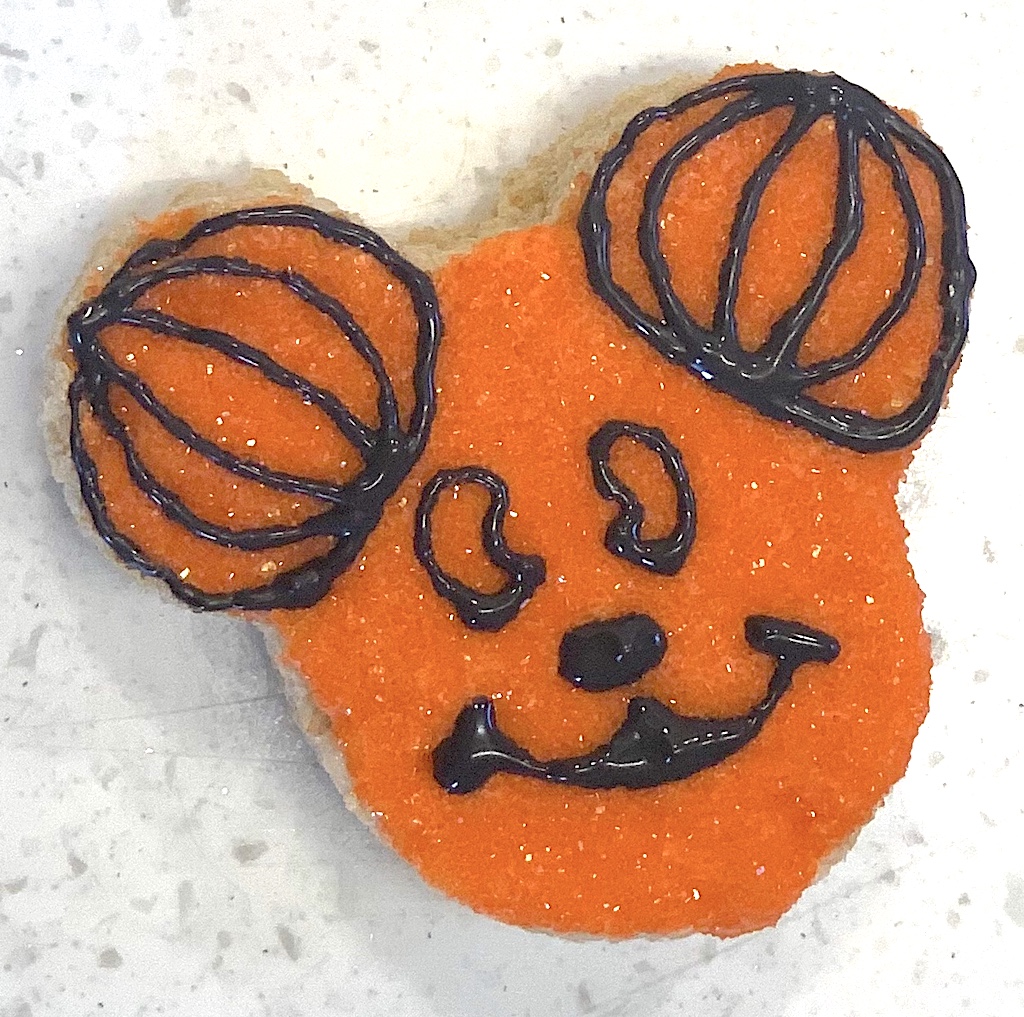
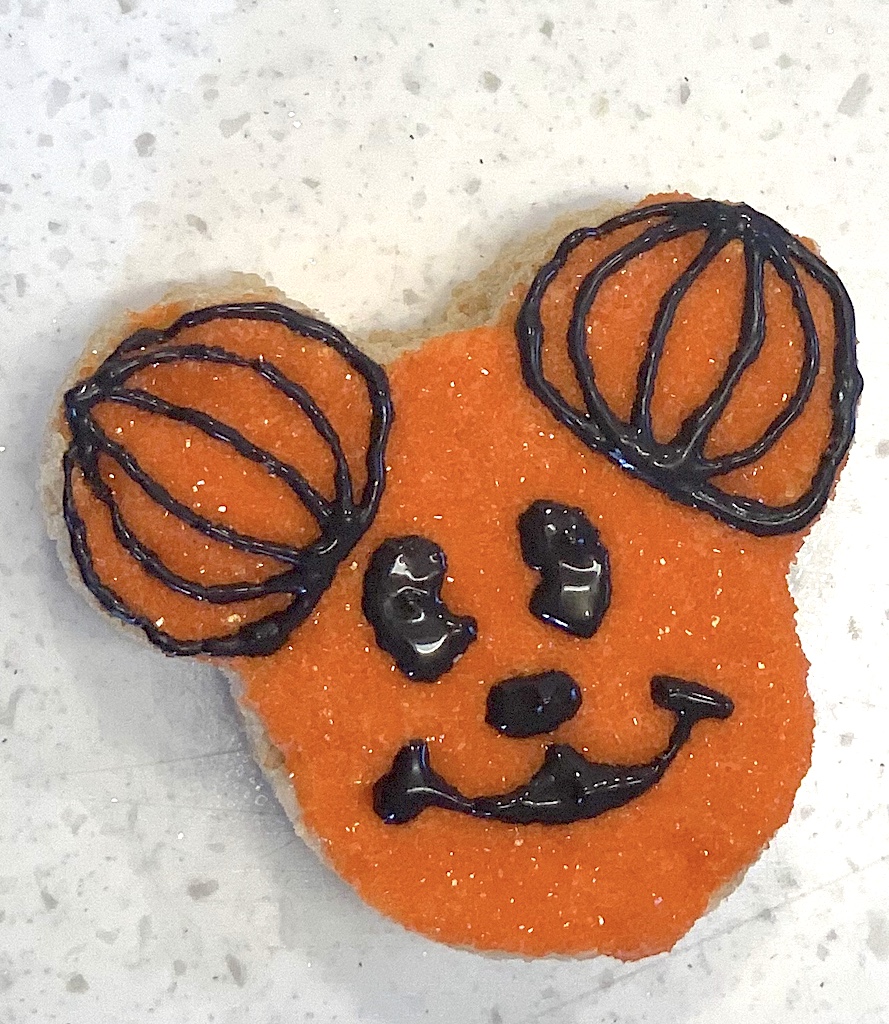
9. Above the eyes, draw 2 slanted lines for the bottom of the eyes.
10. Next you want to make a bean shaped eye connecting it to the lines at the bottom and fill those in.
11. Now outline the head just as you outlined the ears. Draw a long oval down the center of his face. When you get to the bottom, pick up the bag. You do not want to drag the lines along the face so do it in between the face and not on the actual face.
Then you want to draw the lines (like the ears) on both sides of the long oval to complete the pumpkin look.
Now you have the perfect Halloween treat inspired by your favorite Disneyland favorites!